Oh I am so excited!! It has been decorating central over in the Walter pad! No major projects but just a few things I have been wanting to do to personalize our already awesome house! The project we started and finished today (oh, that's the best feeling, to get something completely DONE!) was framing the master bathroom mirror.
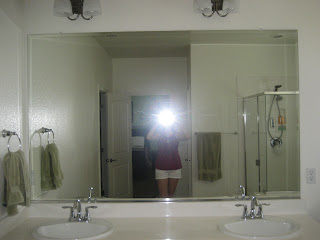
Here is the before- I love how HUGE the mirror is and we just needed to spruce it up a bit:

So, we headed on over to Home Depot and purchased three 8 foot pieces of dark cherry colored finished wood moulding and a saw thing-a-ma-jig that makes cutting at an angle easy. We prob should have just spent the extra money on an electric saw since they weren't too expsensive and I plan on framing the rest of the mirrors and putting up more chair rail, but it still did it's job!
Oh, how I love my hubby!! He's totally the best- he does not really care too much about doing these projects since we live in a brand new house, but he does them anyway since I want them done!

All the cutting of the edges was supper easy, but then we had to cut notches in the top of the wood to make room for the things that mount the mirror to the wall. I know there's a way to get back mounts for a mirror but we didn't want to deal with taking the mirror down and all that junk.
 Once the pieces were cut to size we used some of this stuff on the backside to glue it to the wall and mirror:
 Hard at work, with my little helper supervising
 See how we had the liquid nails on the top and bottom? Well, once it put it on the mirror you could totally see glue reflecting back at you, so we had to take it down and wipe up this goopy mess
 Here our little helper was photographer as we were cleaning the mirror:
 So once we figured that out, we put the liquid nails on the rest of the pieces and stuck them to the mirror.
 And now for the finished product!!!
Before:
 After:
 I think it turned out so good!! I totally love that it matches the cabinets perfectly and it just adds that extra something!!
Now, it's not totally perfect, but what DIY project is?? Especially since this is the first time we ever attempted something like this.
The bottom didn't go flush on the mirror because of the bottom of the mount for the mirror made it stick out a little, so the edges of the wood didn't match perfect, but a little wood marker over the glue once it dries should work.


